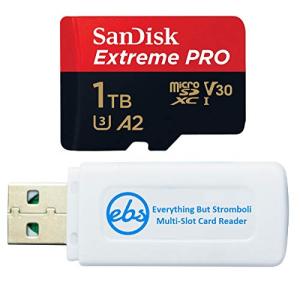
Getting your GoPro ready for some incredible Go Pro photography is super easy and fun! First things first, make sure your battery is fully charged. A dead battery can spoil the excitement, so plug it in and get it juiced up. Once you’re ready to roll, consider formatting your SD card. It’s a quick way to clear out old files and ensure you have enough space for those epic shots.
Next, familiarize yourself with the controls. The touchscreen is user-friendly, but don’t overlook the buttons. They can be lifesavers when you're out in the wild, especially if your hands are wet or you're wearing gloves. Spend a little time exploring the settings; you’ll want to know how to switch between photo modes, adjust the resolution, and toggle the field of view. This knowledge can make a big difference in your Go Pro photography.
When you start snapping away, keep in mind the different shooting modes available. You can choose from burst mode, time-lapse, or even regular photo settings, whatever fits your adventure. Experiment with different angles and perspectives. The GoPro is designed to be versatile, so don’t be afraid to get creative! Try mounting it in various locations, like on your helmet or surfboard, for unique shots.
Lastly, make the most of your GoPro’s accessories. A sturdy tripod or a flexible stabilizer can elevate your photos from good to stunning. Filters can also help with lighting, especially in bright or varied conditions. With the right gear, the world is your studio, and you can capture amazing Go Pro photography wherever you go! Just remember to have fun and embrace the adventure.
Essential Settings for Stunning Photos
Getting the best shots with your GoPro hinges on knowing the right settings. Let’s dive into some essential adjustments that can help you capture those stunning photos you’ve always dreamed of.
First up, consider the resolution. Using the highest resolution possible gives you the most detail in your images. For GoPro photography, shoot at 12MP or higher if your model allows it. This will ensure that your photos are crisp and clear, especially when you zoom in or crop later.
Next, play with the field of view (FOV). GoPro cameras give you options like Wide, Medium, and Narrow. Wide captures more of the scene, which is great for landscapes or action shots. Medium and Narrow work better for close-ups or when you want to focus on a specific subject. Pick what suits your shot!
Don’t forget about the exposure settings. Experimenting with the exposure can make a huge difference in how your photos turn out. Use the “Spot Meter” mode if you’re shooting a subject in bright sunlight. This helps to keep details in both dark and light areas, avoiding washed-out images.
Lastly, keep an eye on the white balance. This setting affects how colors appear in your photos. For sunny days, a setting like “Sunny” or “Cloudy” can warm up the colors and make them pop. For indoor shots, try “Auto” or “Native” to adapt to different lighting conditions. With these settings dialed in, you’re on your way to mastering Go Pro photography and taking amazing shots.
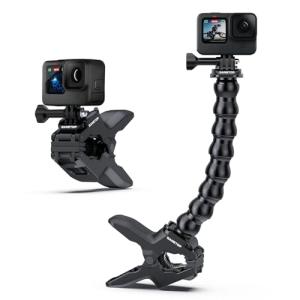
Sametop Jaws Flex Clamp Mount for Action Cameras
Easily attach your action camera to any surface for stable and creative shooting angles
Product information
$16.99 $12.99
Product Review Score
4.21 out of 5 stars
134 reviewsProduct links
Creative Angles for Unique Perspectives
When it comes to Go Pro Photography, getting unique perspectives makes all the difference. It's not just about having the best camera; it’s about how you use it. Experimenting with different angles can turn a mundane shot into a breathtaking moment.
One great way to get creative is to shoot from low angles. Positioning your camera close to the ground gives a dramatic look, especially when capturing landscapes or action shots. You’ll notice how the foreground becomes more prominent, adding depth and interest to your photos.
Another fun trick is to shoot from above. If you're hiking or exploring a new area, try holding your GoPro high in the air to capture the vastness of your surroundings. It’s a great way to show off the scenery and gives a cool birds-eye view.
Don’t forget to play with your surroundings. Use natural frames like doorways or trees to highlight your subject. This can guide the viewer’s eye right to what you want to showcase in your Go Pro Photography. Plus, it adds layers and context to your images, making them feel more dynamic.
Try experimenting with angles that include reflections as well. Water, mirrors, and glass can create stunning images. When you capture the reflection, it tells a story and can make your Go Pro Photography truly stand out.

GoPro Hero 11 Black - Waterproof 5.3K Action Camera
Capture every adventure with stunning 5.3K clarity and rugged waterproof design
Product information
Product Review Score
4.44 out of 5 stars
74 reviewsProduct links
Editing Tips for Perfect Finishing Touches
Editing your Go Pro Photography can take your shots to the next level. You don't need to be a pro to make your photos pop. A few simple tweaks can make a big difference. Let's dive into some easy tips for perfecting your images.
First off, don’t underestimate the power of cropping. Sometimes, all you need is to trim away distractions and center the action. Focus on what really matters in your shot. If the lighting isn’t right, use editing software to adjust brightness and contrast. This can bring those colors to life, making your images feel vibrant and engaging.
Color correction is another great tool in your editing arsenal. Go Pro Photography often captures a world full of colors, but they might not always appear as vivid as you remember. Boost those hues a bit or use filters that enhance the natural beauty of the scene. Remember to keep it looking natural—too much saturation can make your photo look unreal.
Lastly, don’t forget about sharpening your shots. A little extra detail can make your image stand out. Just be careful not to overdo it, or your photo may look grainy. Use the sharpening tool in your editing program to enhance clarity without losing that smooth feel.